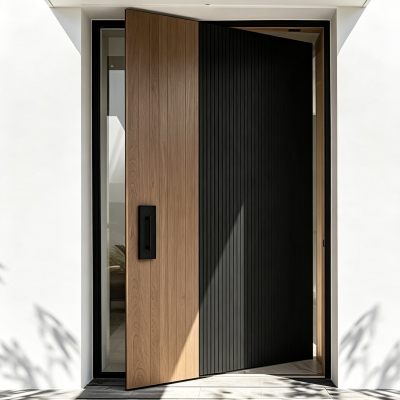
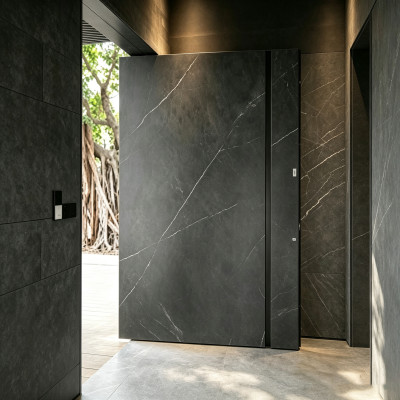
Aluminum Entry Door Installation: Complete Contractor Guide
A premium aluminum entry door is only as good as the installation that holds it. Frame the opening wrong, and even the best 6063-T5 thermal-break door will leak air, bind at the locks, and void its warranty within the first season. This guide walks contractors, builders, and serious DIY homeowners through the complete aluminum entry door installation sequence — from rough opening preparation to final hardware alignment — with the torque specs, tolerances, and quality checks that separate professional work from callbacks.
We also explain why pre-hung systems like those from Landran Door simplify the process: factory-aligned frames, pre-installed thermal-break strips, and calibrated hardware that dramatically reduce on-site adjustment time. Whether you are installing a standard single door or planning for a later pivot door upgrade, the fundamentals below apply.
Quick Answer: Professional Installation Is Essential
Here is the short version before we get into the details. Aluminum entry door installation is not a "watch one YouTube video" job. Five checkpoints decide success or failure:
- Plumb, level, and square: The frame must be true in all three planes before a single anchor is driven. Out-of-square frames cause binding, broken seals, and premature hardware wear.
- Proper anchoring: Anchor type and spacing must match the wall structure — wood stud, masonry, steel frame, or ICF — and the frame must be anchored at hinge locations first.
- Water management: A sill pan, flashing, and correctly applied sealant beads prevent the number one field failure in exterior doors: water intrusion.
- Thermal-break continuity: The polyamide insulating strip must never be bridged by metal fasteners or cut with poor shim placement, or you lose the energy efficiency you paid for.
- Hardware alignment: Multi-point locks, hinges, and door sweeps need final adjustment under real closing conditions.
One more point before any work begins: most aluminum door warranties, including Landran's 10-year program, require professional installation with documented compliance to the manufacturer's manual. Amateur installs that cut corners on any of the five checkpoints above usually end up voiding coverage — and the repair cost exceeds the installation fee you were trying to save.
Tools and Materials Checklist
Gather everything before you start. Nothing kills a job's rhythm — or its quality — like running to the supply house mid-installation.
| Category | Item | Why It Matters |
|---|---|---|
| Measuring & Leveling | 6-ft spirit level, 2-ft level, laser level, tape measure, framing square | Plumb/level/square verification at every stage; lasers speed multi-point checks. |
| Shimming | Plastic or cedar shims, shim screwdriver | Shims at hinge and strike locations carry door weight and keep the frame true. |
| Anchoring | Impact driver, masonry drill bits, sleeve/expansion anchors or wood screws, torque wrench | Anchor type must match wall material; torque specs prevent over-crushing the frame. |
| Sealing & Weatherproofing | Outdoor-grade sealant (silicone or polyurethane), caulk gun, backer rod, sill pan or pan flashing, self-adhered flashing tape | Water management at threshold and jambs; thermal-break sealant where specified. |
| Hardware | Hex keys, screwdrivers, rubber mallet, door sweep, weatherstripping | Final hinge, lock, and sweep adjustment. |
| Safety & Misc | Gloves, safety glasses, pry bar, shims, wooden blocks | Protection during heavy frame handling and final adjustments. |
If you are installing a factory pre-hung unit such as a Landran pre-hung aluminum door, the frame arrives with the thermal-break strips, weatherstripping, and hinges already installed — which removes roughly half the items from this list and a full day of on-site labor.
Step 1: Measure and Prepare the Opening
The rough opening is the foundation of everything that follows. Check it before the old door comes out, so you know what you are dealing with.
Rough opening tolerances
For standard aluminum entry doors, the rough opening should be 1/2 to 3/4 inch wider and taller than the frame — just enough for shims and leveling, never more. Verify width at the top, middle, and bottom, and height on both sides. If the opening is more than 1/4 inch out of square, correct the framing before installation; a door frame cannot absorb framing errors and still function.
Substrate condition
Inspect the structural substrate: wood studs must be sound with no rot, masonry must be free of spalling, and steel frames must be clean of rust. Repair any damage now — sealing over a bad substrate just hides the problem until the warranty is gone.
Removing the old door
When replacing an existing unit, remove the old door and frame carefully rather than destroying the opening. Cut through the old sealant at the exterior flanges with a utility knife before prying, so you do not tear the weather barrier. Inspect the exposed rough framing for rot or insect damage — if the old door leaked, the damage is almost always in the bottom corners and sill area, exactly where the new sill pan must sit. Replace any compromised wood to sound material and let the area dry completely before flashing. Keep the opening clean of debris; sawdust and mortar crumbs under the threshold will compromise the seal and void the pan's drainage plane.
Weather barrier and flashing
Install the weather-resistive barrier (house wrap or equivalent) and integrate a sill pan with self-adhered flashing tape at the bottom corners. The sill pan catches any water that gets past the threshold and redirects it outward — this single step eliminates most water-intrusion callbacks. Sequence the flashing shingle-style (top layer over bottom layer) so water sheds naturally.
Step 2: Frame Positioning and Shimming
This is where precision matters most. Set the frame in the opening, centered side-to-side, and begin the three-plane adjustment:
- Level the sill: Set the frame on the sill pan, level across the threshold, and shim up the low side. A crowned floor is normal; the frame must still end up level.
- Plumb the hinge jamb first: Using the 6-ft level (or laser), plumb the hinge jamb front-to-back and side-to-side. The hinge jamb carries the door's weight, so it gets priority.
- Square the head: With the hinge jamb plumb, check the header for level and set the strike jamb plumb to match. Check the diagonal measurement of the opening — equal diagonals mean a square frame.
- Shim at hinge and strike locations: Place shims behind every hinge and strike plate location, and at each anchor point. Shims should be driven in pairs from both sides, never forced. Loose shims will settle and pull the frame out of plumb within weeks.
Contractor tip: On pre-hung units like Landran's, hinge locations are factory-marked and the pre-calibrated hardware tolerates minor in-field adjustment. Shim exactly at those marks — it is where the weight lands.
Leave the frame roughly 1/8 inch proud of the finished wall face (interior or exterior, depending on design) so the casing and exterior trim sit flush after finishing.
Why the three-plane check matters
Experienced installers re-verify plumb, level, and square after the frame is temporarily screwed — not just before. Why? Because driving anchors can pull an aluminum frame by a millimeter or two, especially in masonry walls where the hammer drill runs hot. A quick diagonal check (both diagonals within 1/8 inch of each other) catches this drift while there is still time to correct it. This is the difference between a door that still closes perfectly in five years and one that slowly develops a visible gap at the head — and it is exactly the tolerance discipline pre-hung manufacturers assume in their installation manuals.
Step 3: Anchoring the Frame
Anchoring transfers the door's weight and wind loads to the structure. Get the anchor type, spacing, and torque right.
Anchor type by wall material
| Wall Material | Recommended Anchor | Notes |
|---|---|---|
| Wood stud | No. 10–12 stainless or coated wood screws, 2-1/2 to 3 inches long | Predrill to avoid splitting; screws must bite into the stud, not just sheathing. |
| Masonry / CMU | Sleeve anchors or expansion bolts sized to frame channel | Drill with a hammer drill; clean dust from the hole before setting the anchor. |
| Steel frame | Self-tapping screws (TEK-style) or machine screws into welds | Avoid overtightening; dimpling the aluminum frame channel is a common mistake. |
| ICF / concrete | Tapcon-style concrete screws with proper pilot holes | Match screw length to foam + concrete depth. |
Anchor spacing and sequence
- Anchor the hinge jamb first: one anchor within 6 inches of the top and bottom hinge, then evenly spaced anchors every 16–24 inches.
- Then anchor the strike jamb and header with the same spacing pattern.
- Anchor through the frame's factory anchoring slots — never drill through the thermal-break zone, which bridges the insulation strip and destroys its performance.
- Apply a dab of sealant over each anchor head after driving to protect the fastener and seal the penetration.
Torque guidance: snug the anchors with an impact driver, then finish with a torque wrench at the manufacturer's spec (typically 60–90 in-lb for aluminum frames). Over-torquing distorts the extrusion; under-torquing leaves the door flexing in wind.
Step 4: Threshold and Weather Sealing
Water and air are the two silent killers of entry door performance. This step decides whether the door stays dry and quiet for decades.
Sill pan and drainage
The sill pan installed in Step 1 now does its job. Verify the threshold's weep holes are open and unobstructed — aluminum thresholds have designed drainage paths that let incidental water escape outward. Never caulk weeps shut.
Sealant strategy
- Run a continuous bead of outdoor-grade sealant between the frame and the rough opening on the exterior jamb flanges.
- Use backer rod behind deep gaps before sealing — sealant needs a backing to form a proper weather-tight bond instead of dripping into the cavity.
- Seal the threshold-to-sill-pan joint and the sill pan-to-flashing joints with a full bead, not a spot dab.
- Where the manufacturer specifies a thermal-break sealant or gasket between the threshold and frame, apply it now — it stops air infiltration at the coldest point of the door.
Air infiltration test
Before installing interior trim, run a simple test: close the door and run your hand (or a lit incense stick on a calm day) along all four edges. You should feel no draft at the jambs or under the threshold. If you do, locate the gap, add shim/weatherstripping pressure, and retest. Sealing the air envelope now is far cheaper than an energy audit later.
Step 5: Hardware Installation and Alignment
Modern aluminum entry doors use multi-point locking systems — typically three to five locking points along the strike edge. The final alignment is what makes them feel premium or feel cheap.
- Hinges: On adjustable hinges, set the door so the gap between door and jamb is even top to bottom (typically 1/8 inch on the hinge side). Adjust the hinge screws in small increments — a quarter turn at a time — to shift the door vertically or side to side.
- Multi-point lock: Engage the lock and check that every point engages cleanly. Adjust the strike plates until the handle turns with smooth, even resistance — no binding, no slop. A lock that takes force to engage will wear out in months, not years.
- Door sweep: Set the bottom sweep so it brushes the threshold with light contact. Gap too big lets in drafts and insects; gap too small wears the sweep and scratches the threshold.
- Weatherstripping: Verify the perimeter weatherstripping compresses evenly when the door closes. Pinched, torn, or uneven strips get replaced now — they are cheap, and the labor is already on site.
Why pre-hung matters here: Landran's factory pre-hung system ships with the hardware pre-calibrated to the frame. The field adjustment window is smaller and faster, which is why contractors typically report 30–50% less installation time on pre-hung aluminum doors versus field-assembled units.

Common Installation Mistakes and How to Fix Them
Every service department sees the same handful of failures. Here is what goes wrong, why, and the fix.
| Mistake | Root Cause | Fix |
|---|---|---|
| Out-of-plumb frame | Hinge jamb not leveled before anchoring; shims removed or loose after framing. | Loosen anchors, re-plumb with shims, re-torque. Verify again after 24 hours of settlement. |
| Air gaps around the frame | Sealant applied only to visible trim; missing backer rod; gaps left unfilled. | Remove trim, install backer rod + full beads of sealant at the frame-to-wall joint, reinstall trim over sealed edges. |
| Water intrusion at the threshold | No sill pan; weeps sealed; flashing sequence wrong. | Install sill pan and re-sequence flashing (top over bottom); clear weeps; verify outward drainage. |
| Binding locks / hard to close | Frame out of square; strike plates misaligned; hinge adjustment needed. | Check diagonals, adjust hinges in small increments, then re-align multi-point strikes. |
| Cold frame in winter | Fasteners or shims bridging the thermal-break zone. | Remove offending anchors/shims, re-anchor through factory slots only, reseal penetrations. |
| Over-torqued anchors dimpling the frame | Impact driver used at full speed, no torque control. | Back out, gently flatten any visible deformation with a rubber mallet over a wood block, retighten to spec. |
The pattern worth noticing: most failures trace back to the first hour — prep, plumb, and anchoring sequence. Get those right and the rest of the install is routine.
Post-Installation Quality Checklist
Run this checklist before you call the job done. A professional install is verifiable, not just visible.
- Visual: Frame is plumb, level, and square; gaps even on all sides; trim lines meet cleanly.
- Operation: Door opens and closes smoothly with one finger; handle turns with even resistance; multi-point lock engages all points without force.
- Sealing: No draft around jambs or threshold (air test passed); weeps clear; all exterior joints sealed.
- Hardware: Hinges adjusted, no binding; sweep contacts threshold evenly; weatherstripping compresses uniformly.
- Documentation: Installation photos saved, warranty registration completed with the manufacturer, manual filed with the homeowner.
- Cleanup: Sealant residue removed, protective film stripped from the frame, and the door leaves the site as clean as it arrived.
For manufacturer-backed projects, keep the install documentation — Landran Door provides a structured installation manual and technical support line for every pre-hung aluminum door, and warranty claims move much faster with photos and the serial number recorded.
FAQ: Aluminum Entry Door Installation
How long does it take to install an aluminum entry door?
A professional crew typically completes a standard pre-hung aluminum entry door replacement in 4–6 hours including prep, installation, sealing, and hardware adjustment. Field-assembled or custom openings can push this to a full day. Pre-hung systems from manufacturers like Landran Door cut the estimate toward the low end.
Can I install an aluminum entry door myself as a DIY homeowner?
Physically, yes — with the right tools and patience, a capable DIYer can install a pre-hung aluminum door. Honestly, most manufacturers' warranties require professional installation, so check yours first. If you DIY, follow the manufacturer's manual exactly and photograph each step; the five checkpoints in this guide are non-negotiable.
What are the standard rough opening dimensions for an aluminum entry door?
For a standard 36-inch door, plan a rough opening of approximately 38 x 82-1/2 inches (width x height), and verify the exact spec against the door's installation data sheet. The rule is 1/2 to 3/4 inch of clearance around the frame for shims and leveling — never more.
Do aluminum entry doors need a sill pan?
Yes — strongly recommended, and required by many building codes for exterior doors. A sill pan redirects incidental water that penetrates past the threshold, preventing rot and insect damage in the subfloor. It is the single most effective water-intrusion prevention measure in exterior door installation.
How do you fix an aluminum door that binds at the lock?
First check the frame diagonals — an out-of-square frame causes most binding. Then adjust the hinges in small increments (a quarter turn at a time) to shift the door, and finally re-align the multi-point strike plates so every point engages evenly. If the frame is square and hardware is aligned, binding usually disappears.
Why does my aluminum door frame feel cold in winter?
If you chose a thermal-break door, the frame should not feel cold — that is the point of the polyamide strip. A cold frame usually means the thermal break has been bridged, often by anchors or shims driven through the break zone during installation, or by a non-thermal-break profile. Check anchor placement and consider upgrading to a thermal-break system like Landran's on the next door.
Do I need a building permit to install an entry door?
In most jurisdictions, replacing an entry door requires a permit because it affects the building envelope, egress, and sometimes energy code compliance. Check with your local building department before starting — failure to pull the permit can create problems at resale.
What is the difference between pre-hung and slab aluminum doors?
A pre-hung door arrives with the frame, hinges, and often weatherstripping and hardware assembled — you install the complete unit. A slab door is just the door leaf, and the frame, hinges, and hardware are installed separately on site. Pre-hung is faster, more consistent, and the standard choice for most residential and commercial installs.
How much does it cost to hire a contractor to install an aluminum entry door?
Professional installation of a pre-hung aluminum entry door typically runs $300–$800 in labor for a straightforward replacement, depending on region, wall construction, and whether the rough opening needs framing repairs. Masonry or structural-steel walls, custom sizes, and openings requiring a new sill pan add cost. Get at least three itemized quotes — a suspiciously low bid often means no sill pan, no flashing, or no torque control, which are exactly the shortcuts that cost more in warranty claims later.
How long should an aluminum entry door installation warranty last?
Structural and finish warranties on quality aluminum doors run 10–30 years depending on the manufacturer, while hardware and weatherstripping typically carry 1–5 years. Landran Door backs its aluminum entry systems with a 10-year warranty program, but — as with all manufacturers — the warranty depends on installation that follows the published manual. Keep your install documentation and register the product promptly after installation.
Final Thoughts
Aluminum entry door installation rewards preparation and punishes shortcuts. Measure the opening honestly, get the frame plumb before anchoring, manage water at the threshold, and align the hardware last — those four disciplines prevent the overwhelming majority of field failures.
And when you are specifying the door itself, remember that a quality pre-hung thermal-break aluminum system — with factory-aligned hardware, integrated weatherstripping, and a real warranty behind it — turns a tricky installation into a predictable one. That is exactly what manufacturers like Landran Door engineer for, and it is why experienced contractors lean on pre-hung systems rather than field assembly.
For door specifications, installation manuals, or project quotes, visit the product catalog or contact our technical team through the contact page. More field guides and comparisons are available in the Landran blog.